To use variation swatches for WooCommerce, you need to convert product attributes like color, size, or style into visual selectors instead of dropdown menus.
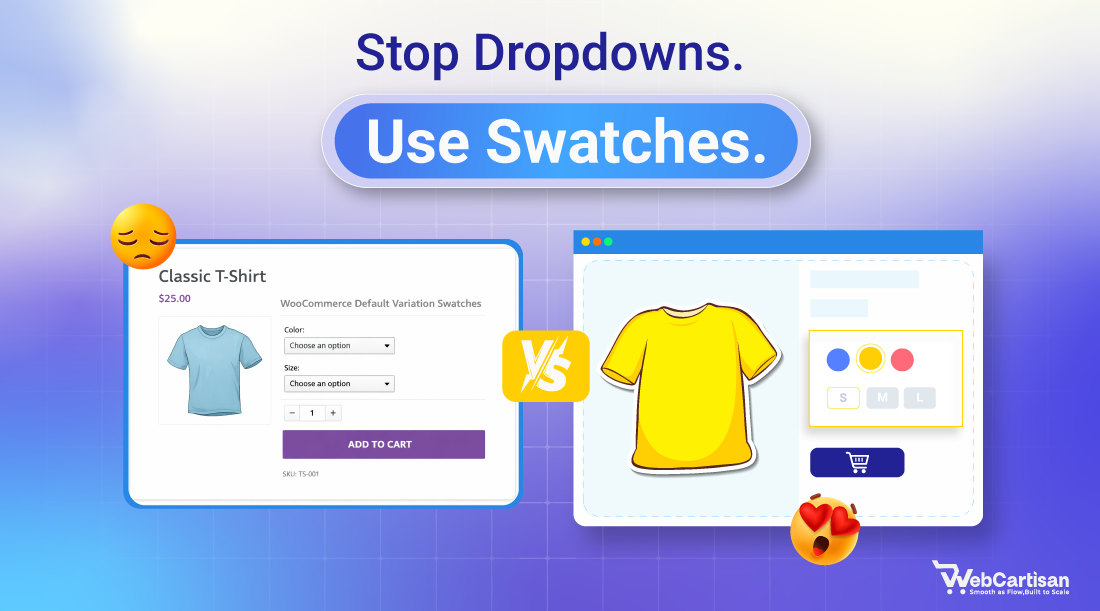
Standard WooCommerce dropdowns often hide product details behind unnecessary clicks. This friction frustrates shoppers and drives them toward your competitors.
Learning how to use variation swatches for WooCommerce allows you to turn those clunky menus into visual buttons, colors, and images.
This guide covers the differences between swatch types, the setup process for plugins, an advanced strategy, and some best practices to boost sales.
What Are Variation Swatches for WooCommerce?
Variation swatches are visual replacements for the standard select boxes found on variable product pages. These elements replace text-only lists with interactive icons. They allow customers to see every available option immediately without clicking a menu.
- Default WooCommerce Dropdowns: Users must click a box to reveal hidden text options.
- Visual Swatches: Shoppers see colors, patterns, or labels at a glance.
Common use cases include:
- Apparel: Showing fabric colors or patterns.
- Furniture: Displaying wood textures or finishes.
- Electronics: Listing storage capacities or material types.
- Wholesale catalogs: Providing quick-select buttons for bulk orders.
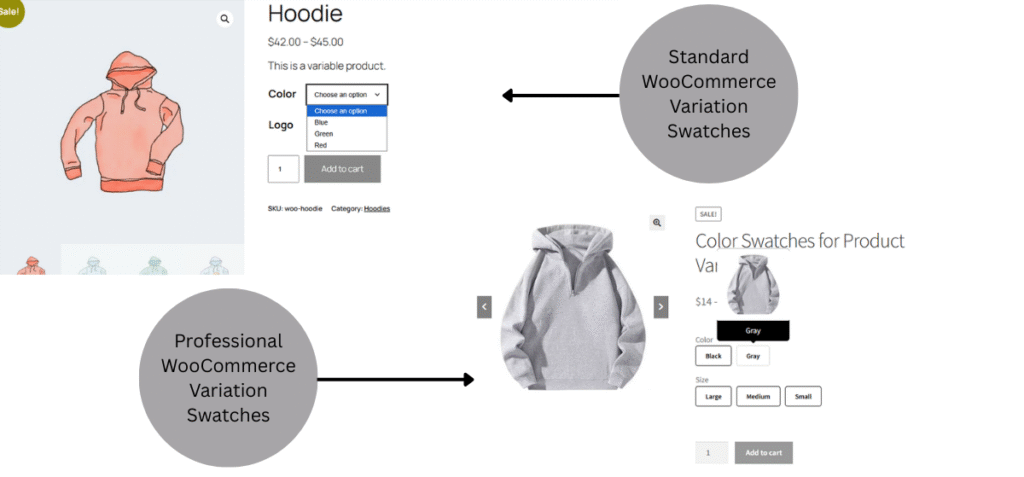
Why Default WooCommerce Variation Dropdowns Hurt Conversions
Dropdown menus create unnecessary cognitive load because shoppers cannot compare options side-by-side. Every choice requires an extra click and a scroll. This friction leads to higher bounce rates and lost revenue.
Mobile usability suffers the most. Tapping tiny dropdown arrows on a small smartphone screen is difficult. Users often select the wrong option by mistake. Such behavior frustrates them and breaks the shopping flow.
Bulk buying presents another challenge. Ordering five different sizes requires repeating the selection process five times. It turns a simple purchase into a repetitive chore.
Types of Variation Swatches You Can Use in WooCommerce
You can choose different visual styles depending on the product data you display. Here are a few variation swatch types you can use on your WooCommerce store.
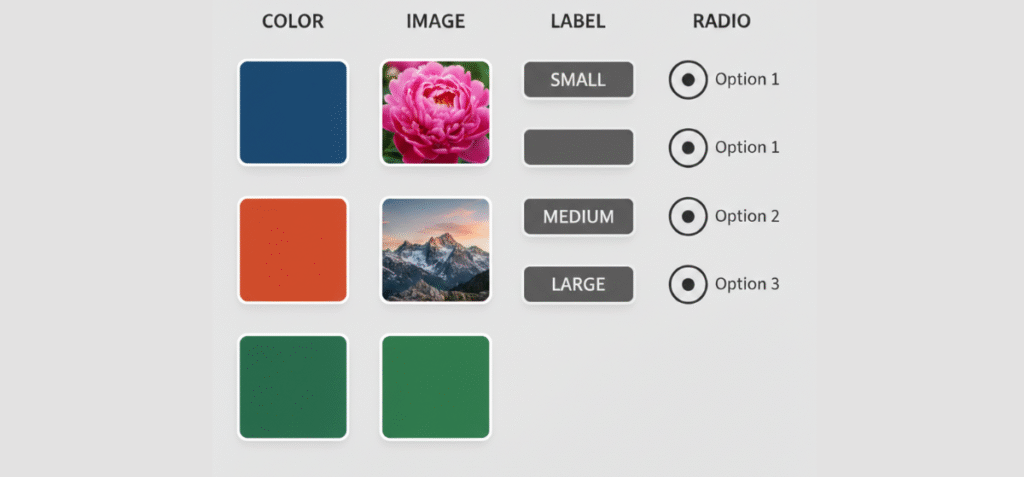
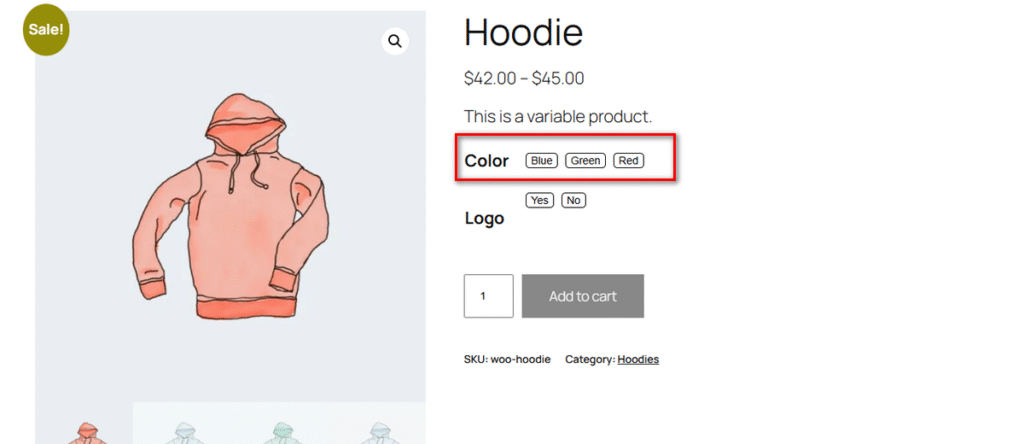
Color Swatches
Color Swatches display a solid color or a hex code. They work best for apparel items like t-shirts, hoodies, and hats where the difference is a simple hue change. You do not need a full photograph to show the difference between red and blue.
Image Swatches
These show a tiny thumbnail of the actual product or a pattern. Use them for complex textures like granite countertops or patterned leggings.
Label / Button Swatches
These use text inside a stylized box. Use labels for non-visual attributes like sizes (Small, Medium, XL) or material types. They are much easier to tap than a standard text list.
Radio Button–Style Variations
These list options vertically with a selection circle. This layout provides maximum clarity. It works well for technical products or wholesale lists where you want every option fully visible without hiding anything.
How to Add and Use Variation Swatches in WooCommerce – Two Methods
There are two primary ways to change how your variations appear to customers. You can stick with the default settings or upgrade your store with a dedicated tool.
Method 1: Using WooCommerce Only (Without a Plugin)
You can set up basic variable products using core WooCommerce settings. This involves creating attributes and then generating variations from them.
- What is possible: You can create standard text-based dropdown lists.
- Limitations: You cannot display actual colors, textures, or photos.
- Styling: You have no control over the appearance without writing custom CSS code.
This method works for simple shops but fails to provide the modern shopping experience customers expect. It lacks the visual cues necessary for effective conversion optimization.
Method 2: Using a Variation Swatches Plugin (Recommended)
A dedicated plugin adds a layer of visual control over your existing attributes. It replaces the default code with interactive elements that drive engagement.
- Visual Control: You can change the shape, size, and border of buttons to match your brand.
- Automation: Most plugins convert existing text attributes into swatches automatically.
- UX: Advanced systems offer tooltips and out-of-stock blurring.
Using a plugin is the standard for serious stores. It opens the door to more advanced features, such as integrating your swatches into variation tables for bulk ordering or displaying them inside quick view modals to speed up browsing.
Step-by-Step: How to Use Variation Swatches with a Plugin
Follow these steps:
Step 1: Choose the Best Plugin for Your Job
You can find numerous WordPress plugins on the plugin repository that can help you use diverse types of variation swatches on your products. However, which one to go with is the real question here.
No matter which plugin you pick, ensure it meets the following criteria:
- Supports All Swatch Types: Ensure the plugin handles Color, Image, Label, and Radio buttons.
- All-in-One Efficiency (Crucial): Most store owners end up installing three separate plugins: one for swatches, one for variation tables, and another for galleries. Look for a comprehensive solution that combines these features.
- Mobile Responsiveness: A great plugin must automatically resize swatches for touch screens. If the buttons are too small on a phone, you will lose mobile sales.
- Advanced User Experience: Check for quality of life features like Tooltips (hover text) and Quick View integration. These small details significantly reduce customer confusion.
- Bulk & B2B Ready: If you sell wholesale, a standard swatch button isn’t enough. Your plugin should offer a Variation Table or list view so customers can order multiple variations in one click.
Then, finally, check the customer support, developer reputation, compare contenders, and pricing (if the plugin comes with paid plans).
For this tutorial, we’ll use Variation Monster plugin, as it meets all the criteria mentioned above.
So, what makes Variation Monster different?
Most tools only handle one part of the variable product puzzle. Variation Monster combines swatches, variation tables, and advanced galleries. It removes the need to install separate plugins for each function.
- Unified Control: You manage design, stock logic, and display settings from one dashboard.
- Performance: Fewer plugins mean fewer scripts loading on your pages.
- Consistency: The design language remains the same across your shop page, product page, and quick cart.
Step 2: Install and Activate the Variation Monster Plugin
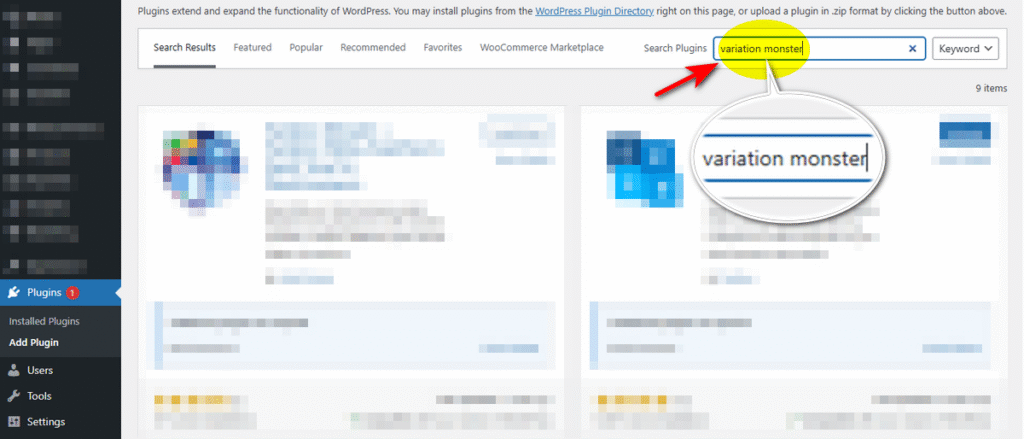
Go to your WordPress Admin Panel > Plugins > Add Plugin.
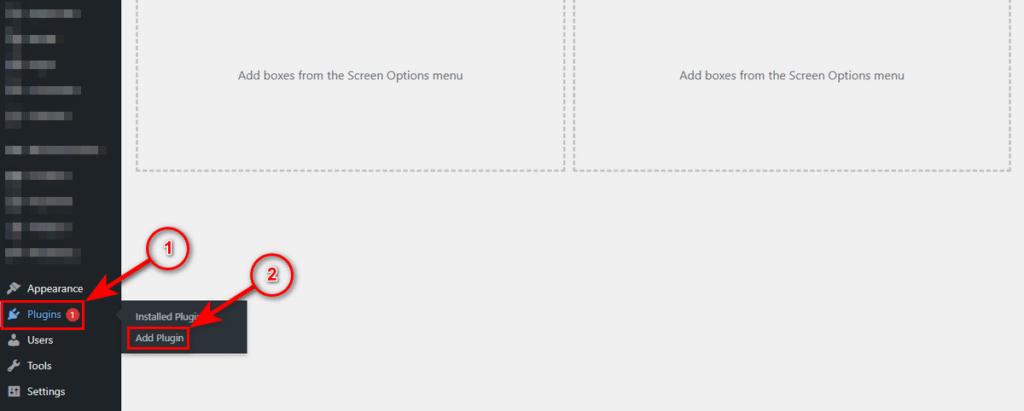
Now, type “Variation Monster” into the plugin search field at the top right.
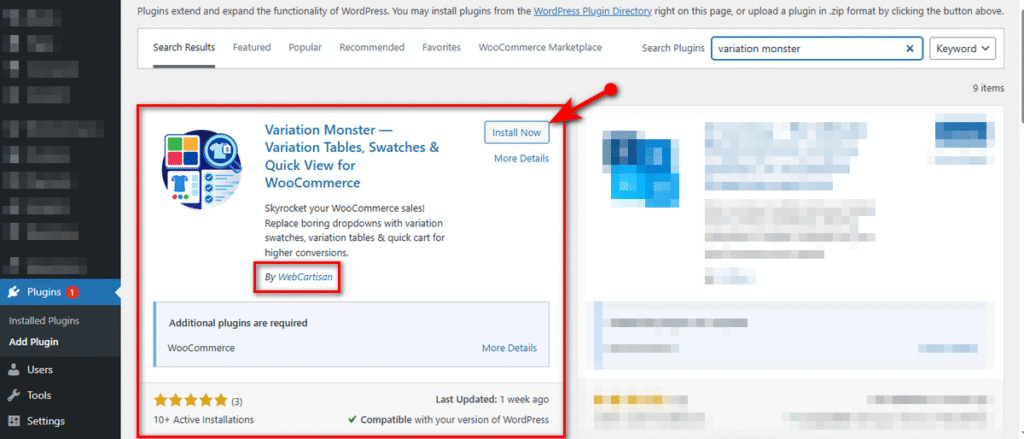
Look for the Variation Monster plugin, created by WebCartisan. Click the “Install Now” button of that plugin.
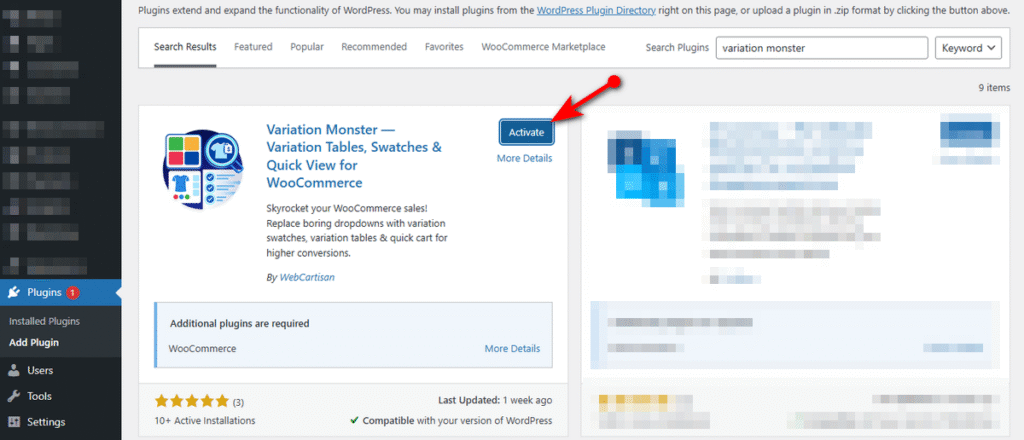
Lastly, hit the ‘Activate’ button, and there you’ve just installed and activated the plugin.
Step 3: Create Product Attributes & Select Swatch Type
The core power of Variation Monster lies in how it upgrades standard WooCommerce attributes. You do not need to create new special attributes; you simply tell the plugin how to display your existing ones.
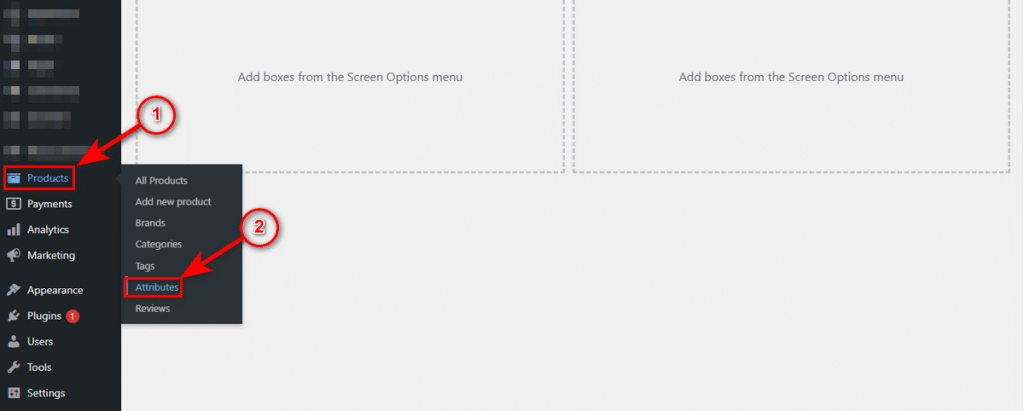
1. Navigate to Products > Attributes in your dashboard.
2. Enter a name for your attribute (e.g., Color or Fabric) and a slug, and checkmark the checkbox labeled “Enable Archives?” if you want WooCommerce to automatically create a unique public page for each option in this attribute
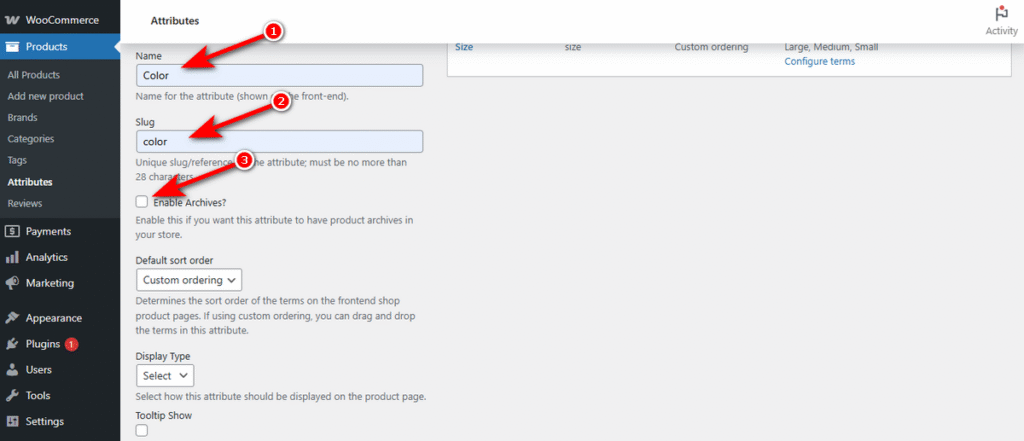
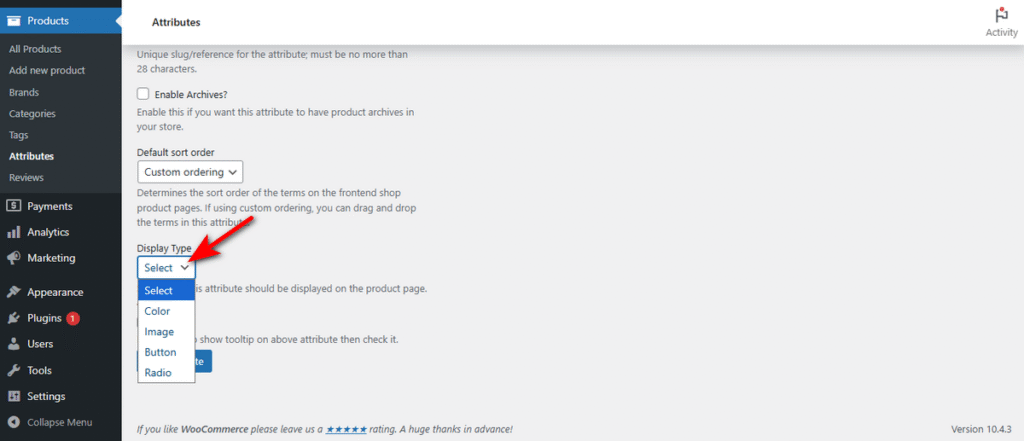
3. Click the new ‘Display Type’ dropdown added by the plugin. It lets you define the visual style of the attribute. Here’s what each option does:
Color: For displaying actual color swatches (hex codes).
Image: For showing texture or product thumbnails.
Button: For creating box-style labels (perfect for sizes like S, M, and L).
Radio: For displaying options as a list with radio buttons.
Select your preferred option.
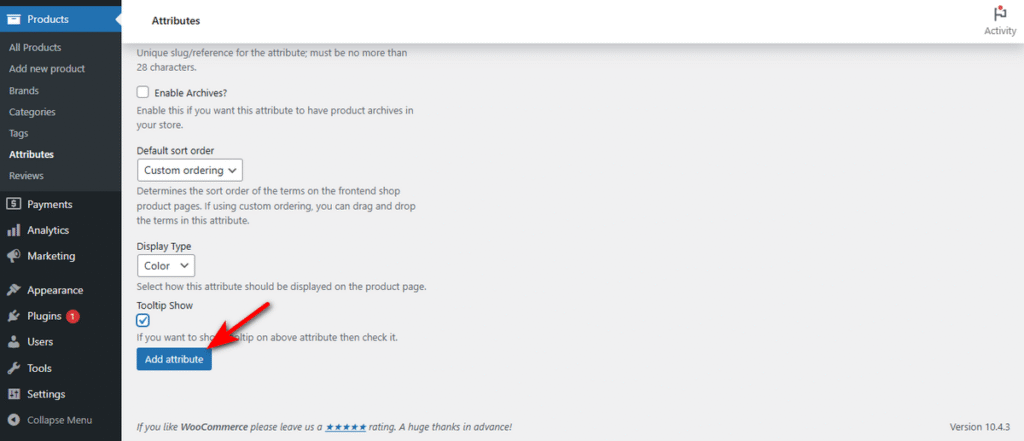
4. Now, you can see a new checkbox labeled “Tooltip Show” at the bottom.
It allows you to toggle hover-text on or off for this specific attribute directly from the setup screen. Checkmark it if you want to display tooltip for this attribute.
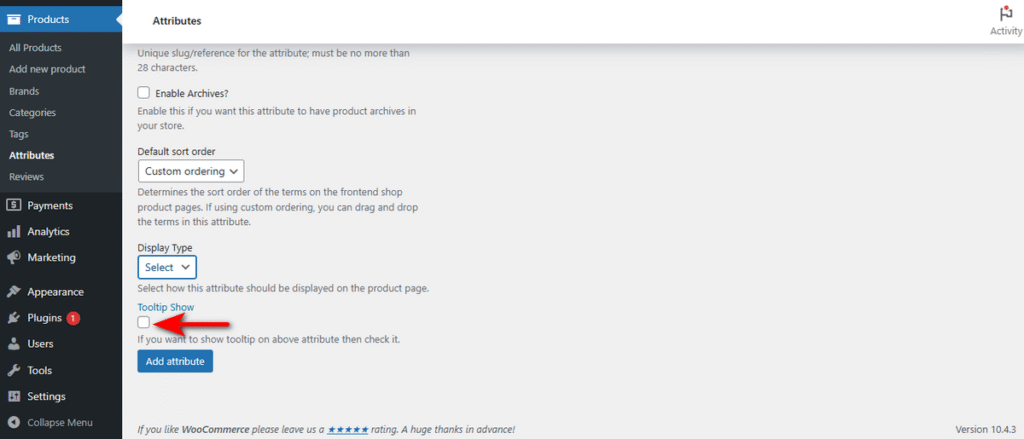
5. Click “Add attribute” button to save it.
Step 4: Configure Attribute Terms
Once the attribute exists, you must define the specific visual for each option.
- On the Products > Attributes page, find your new attribute.
- Click Configure terms in the ‘Terms’ column.
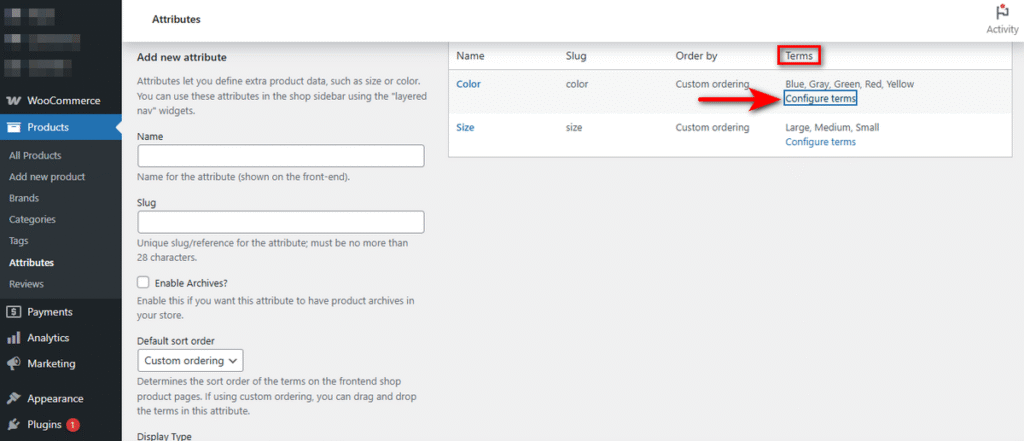
3. Add a new term (e.g., ‘Blue’).
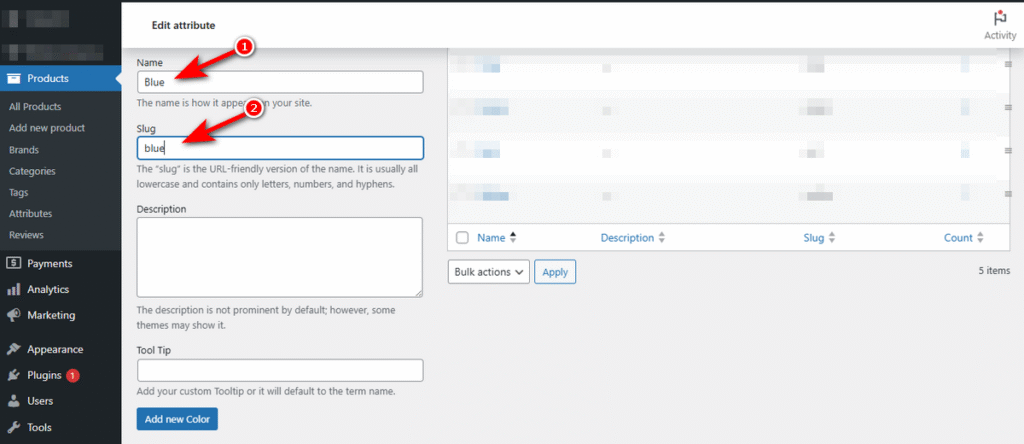
4. Alongside the Name, Slug, and Description fields and box, you’ll notice a new field labeled “Tool Tip.” You can use it to set custom text that appears when a customer hovers over the swatch.
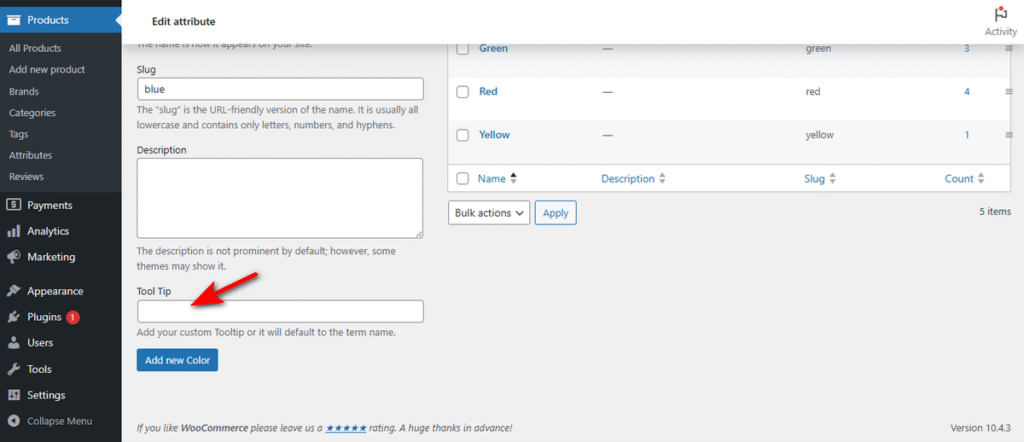
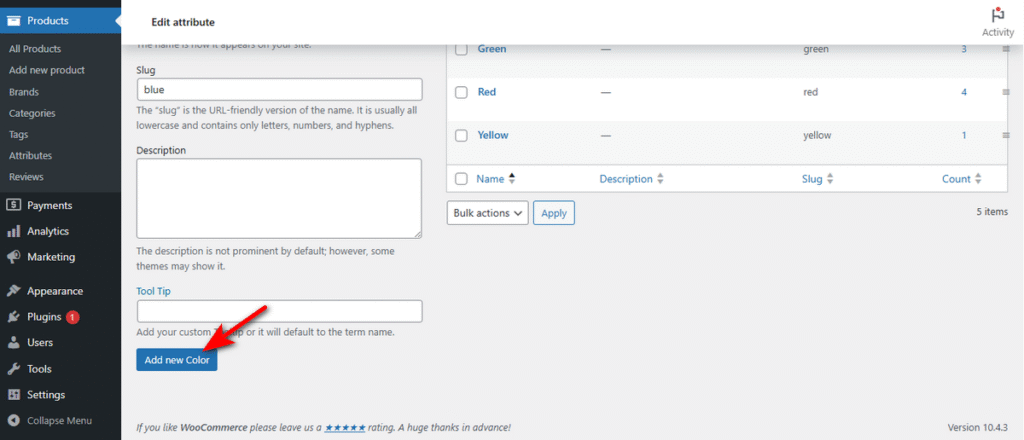
5. Lastly, click “Add new [Attribute Name]” button to save.
Step 5: Assign Attributes to Your Variable Product
Now, apply these visual attributes to your actual products.
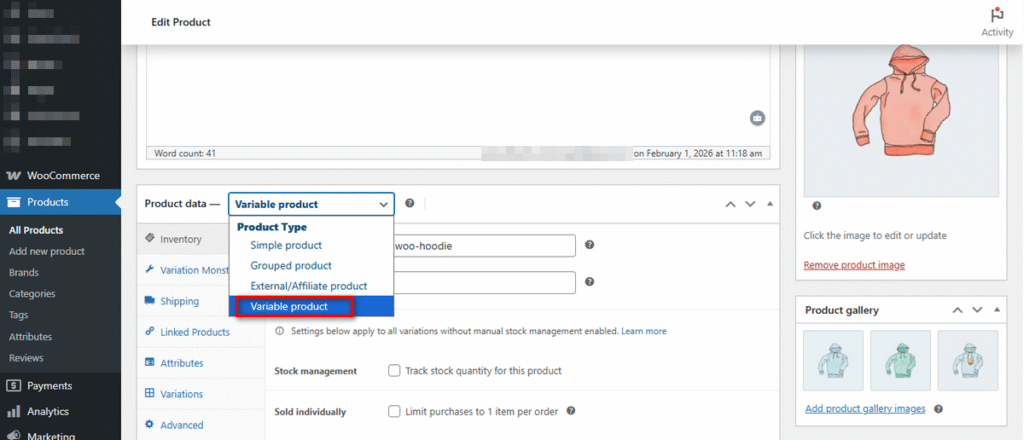
- Open any product and scroll down to the “Product Data” section.
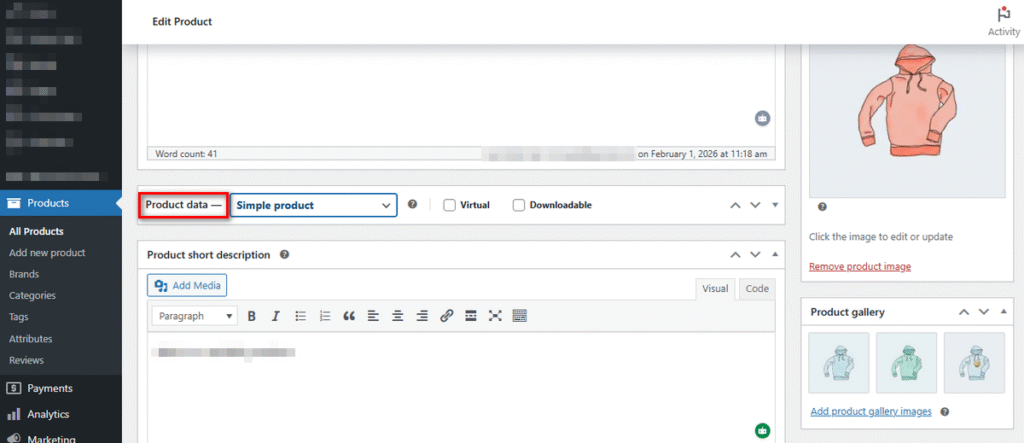
2. Select “Variable product” from the dropdown menu.
3. Go to the ‘Attributes’ tab.
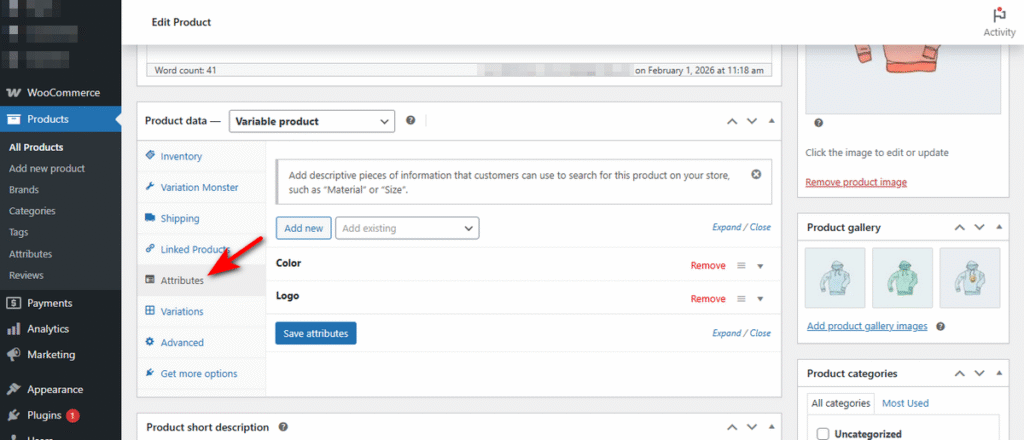
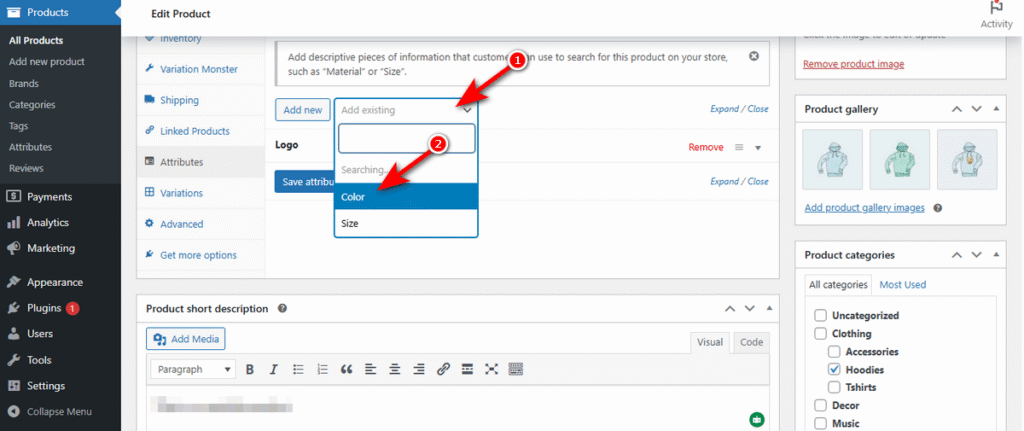
4. Select your visual attribute (e.g., “Color”) from the “Add existing” dropdown menu.
5. Crucial Step: Check both “Visible on the product page” and “Used for variations.”
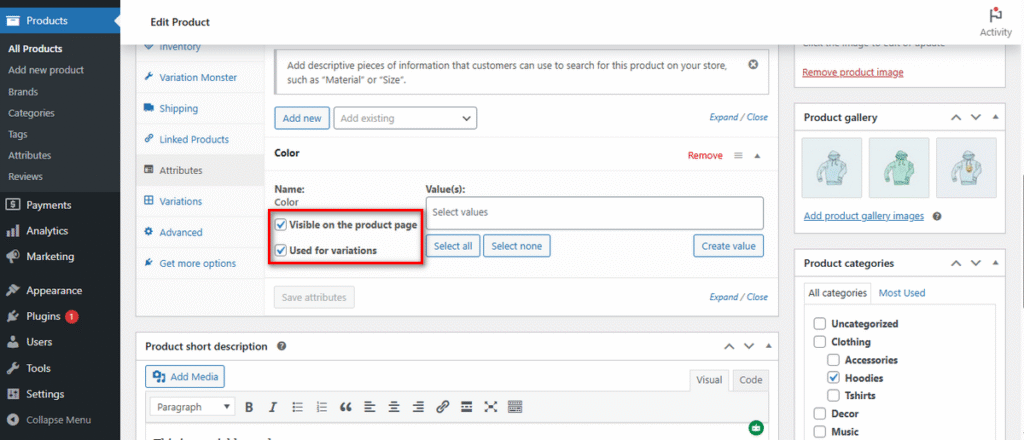
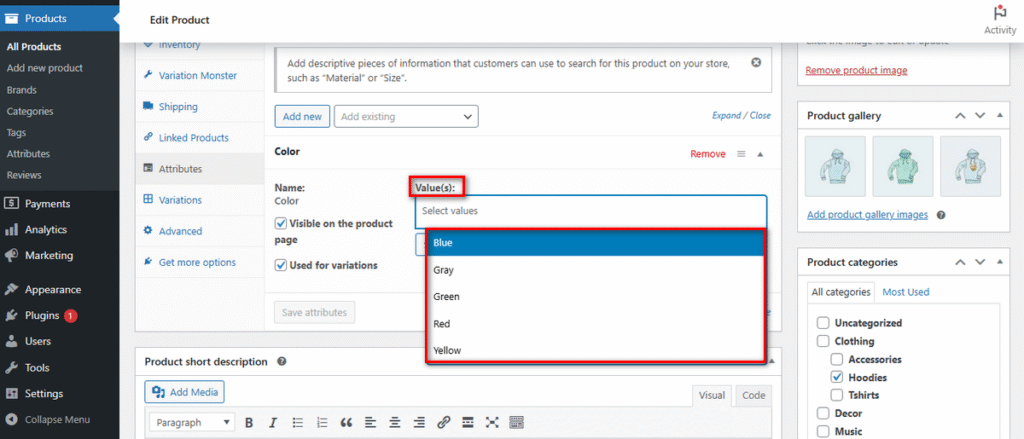
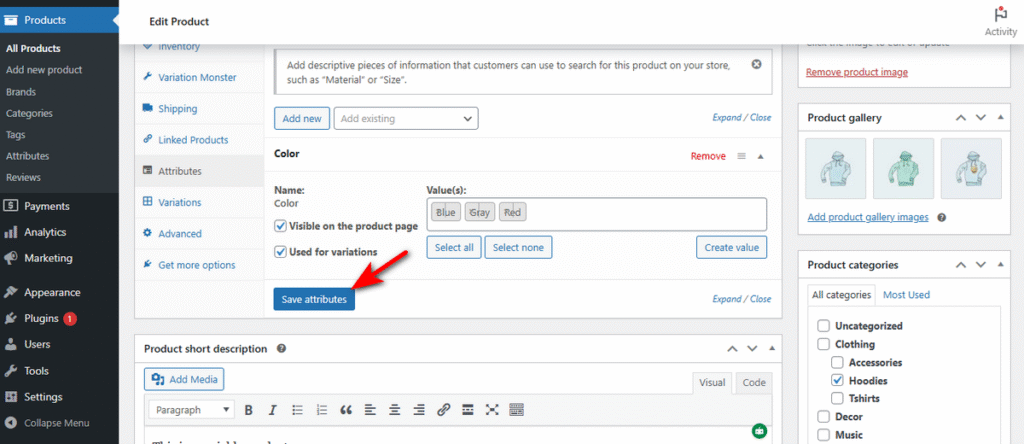
6. Click on the ‘Value(s)’ and select value/s for your preferred attribute.
7. Hit “Save attributes” button.
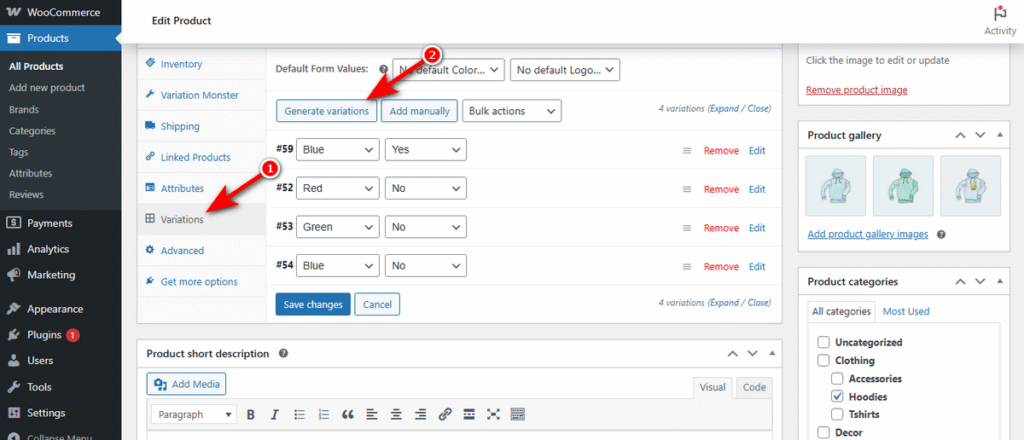
8. Switch to the Variations tab and generate variations as usual.
Step 6: Verify and Optimize the Frontend
Visit your product page to see the result. You should now see clickable buttons instead of the old dropdown menu.
If the swatches look too small or the shape does not match your theme:
- Go to WooCommerce > Settings. Then, click on the new Variation Monster tab.
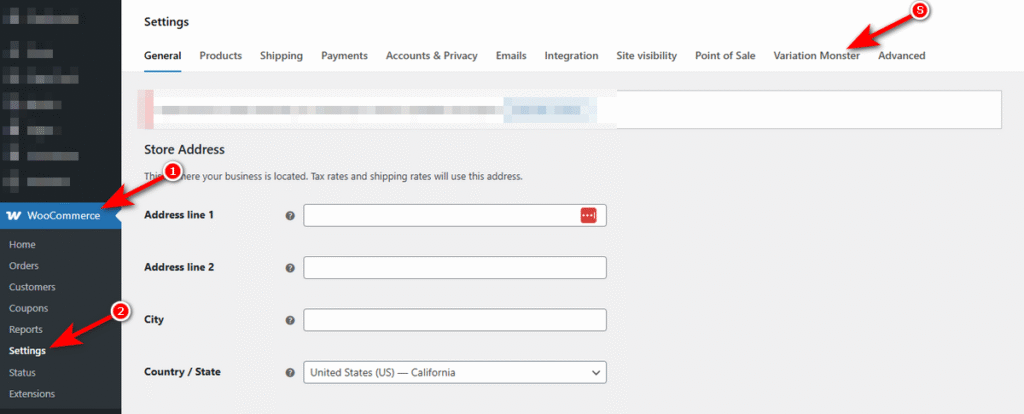
2. Click “Variation Swatches” tab.
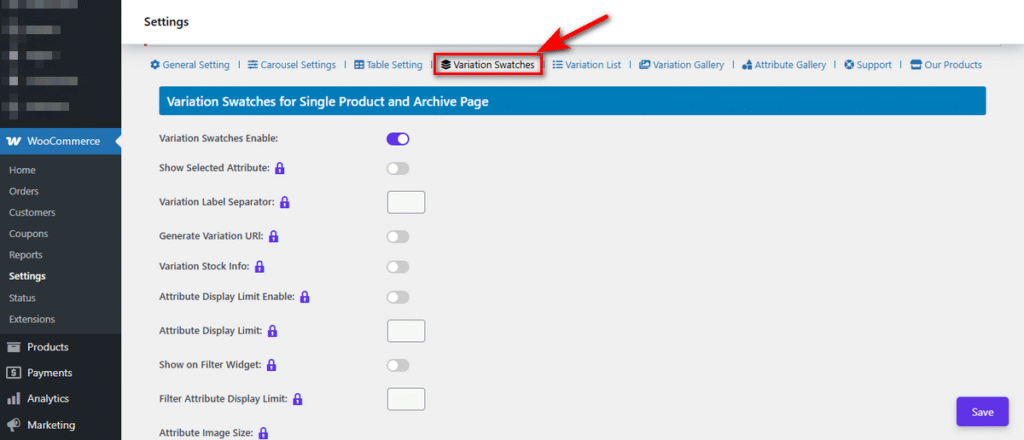
3. Scroll down to the “Image & Color Height (px)” area, adjust the Swatch Width/Height (e.g., set to 40px for better visibility), and hit ‘Save’ button.

Bonus: Learn an Advanced Strategy Using Variation Monster.
Now that your basic swatches are active, you can leverage the plugin’s more powerful features to boost user experience and average order value.
Convert Swatches to Tables for B2B (Bulk Ordering)
For wholesale stores, clicking buttons one by one is slow. A customer buying 50 items needs a list, not a pretty graphic.
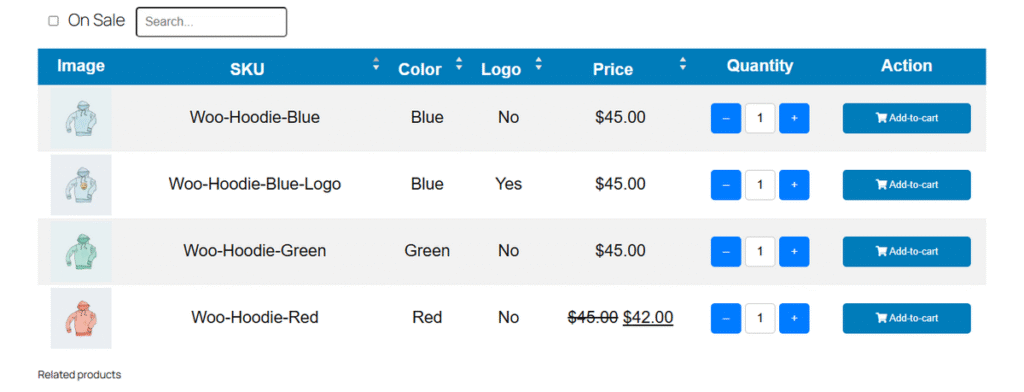
Variation Monster allows you to switch from swatches to a Variation Table layout for specific products.To do that, click “Table Setting” tab, toggle on “Variation Table On” switch, and hit ‘Save’ button.
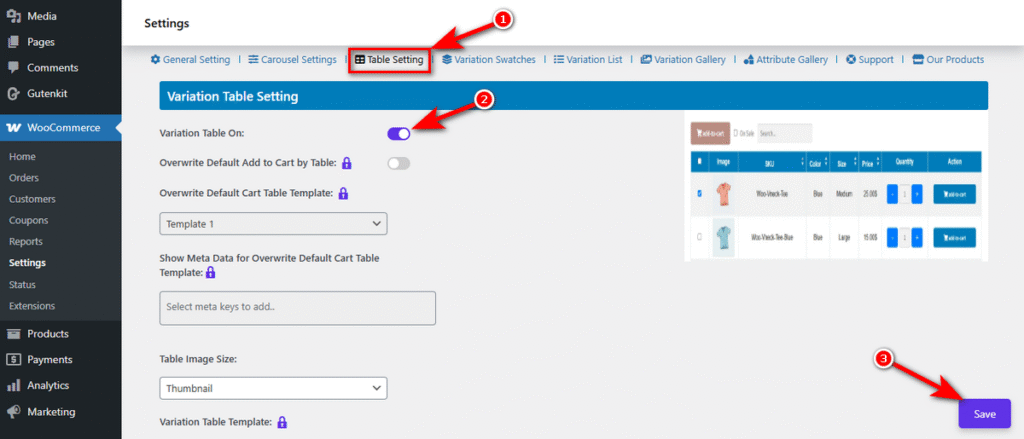
Now, visit a variable product details page, and you’ll notice a table featuring variations of that product.
So, that’s how you use variation swatches for WooCommerce. Note that we just showed some basic functionalities of the Variation Monster plugin. It can do much more when you get its premium version.
For example, you can Enable Quick View option to help customers see all the product details and variations in a popup without visiting the product details page! This one feature can increase conversion.
Try Variation Monster Pro and reap its full benefits.
Best Practices for Managing WooCommerce Product Variations
Managing complex inventory requires discipline. Poorly organized data leads to confused customers and slow website performance.
Follow these rules to keep your store efficient.
- Limit Variation Overload: displaying too many choices can paralyze a buyer. If a product has 50 different options, split it into separate products. Keep the number of combinations under 15 per product whenever possible to maintain speed and clarity.
- Use Logical Hierarchy: Arrange your attributes in a way that makes sense to the human brain. List sizes from small to large, not randomly. List colors alphabetically or group them by tone (warm vs. cool).
- Match Swatch Type to Attribute: Use image swatches for patterns and textures. Use color swatches only for solid hues. If you sell fabric, a solid red block does not represent a red plaid shirt accurately.
- Keep Variation Names Human-Readable: Avoid internal codes like “BLU-001” in the frontend label. Use clear names like “Midnight Blue.” This ensures customers know exactly what they are selecting.
- Optimize for Mobile Tapping: Ensure your touch targets are at least 44×44 pixels. This prevents fat-finger errors on mobile devices.
Frequently Asked Questions (FAQs)
How Do I Show Variations as Buttons in WooCommerce?
Get the Variation Monster plugin. Open a variable product and navigate to “Product data-” area. Click “Variation Monster” tab and choose your attribute’s display type as ‘Button.’
How Do I Import Variations in WooCommerce?
You can bulk import variations using a CSV file. Go to Products > All Products and click Import. Upload your CSV file, ensuring it contains columns for “Parent SKU” and specific attribute values. WooCommerce will map these columns to generate the variations automatically during the import process.
What Type of Product Allows You to Add Variations in WooCommerce?
Only the Variable product type supports variations. You must change the “Product data-” dropdown from “Simple product” to Variable product to unlock the ability to add attributes like size, color, or material.